
Imagine this: You’ve just landed in Tokyo. You’re fueled by vending machine coffee and the sheer excitement of finally being in Japan. You approach the sleek, glowing rows of automatic ticket gates at Shinjuku Station. You tap your phone, the little doors swing shut with a judgmental *clack*, and a high-pitched “pi-pi-pi!” rings out. Suddenly, you’re the human roadblock in a river of a thousand commuters. 🌸🏯🚄
Welcome to the **Ticket Gate Trap**.
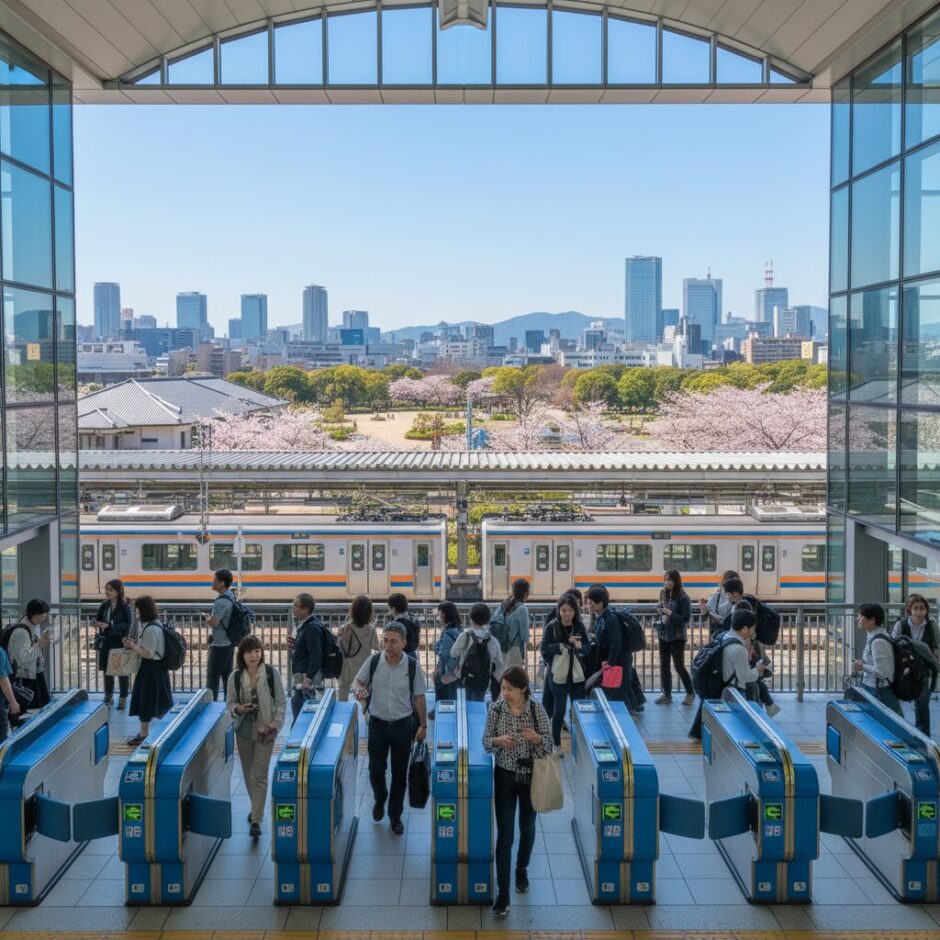
In Japan, the *Kaisatsu* (ticket gate) is more than just a barrier; it’s a high-speed precision instrument. To the uninitiated, it’s a source of anxiety. To the local, it’s a seamless transition performed at a brisk walking pace. If you want to navigate Japan like a pro and avoid the “walk of shame” to the station office, you need to master the rhythm of the rails.
🇯🇵 Quick Hack Summary
- ✅ Master the Tap: IC cards and phones require a firm “touch,” not a hover.
- ✅ Watch the Lights: Only enter gates with a Green Arrow; avoid the Red X.
- ✅ Fare Adjustment is King: If your card fails, look for the yellow “Fare Adjustment” machine nearby.
(Beginner-Friendly)
—
## 1. The “Hover” Hesitation (The Tap Trouble) 📱
The most common mistake tourists make is treated the IC card reader (for Suica, Pasmo, or Icoca) like a contactless credit card terminal in the West. You might be used to holding your card two inches above the reader and waiting for a “Success” screen.
In Japan, the gate expects a **physical touch**. While it technically uses NFC (Near Field Communication), the gates are optimized for speed. If you hover too high or pull away too fast, the sensor won’t register the transaction, and the gates will slam shut.
💡 Pro-Tip:
Listen for the “Pi-pi!” (Two short beeps). This means you’re good. A long “Peeeee!” means something went wrong. On a phone, make sure your “Express Transit” card is set up so you don’t have to FaceID every time you pass a gate!
—
## 2. The “Wrong Side” Shuffle 🏃♂️
Japanese ticket gates are bi-directional, but they are not *always* open from both sides. Before you walk toward a gate, look at the small display at eye level or on the floor.
* **Green Arrow (⬇️/⬆️):** The gate is open and ready for you.
* **Red X (❌):** The gate is currently being used by people coming from the opposite direction.
If you walk into a Red X gate, you’ll trigger the alarm. In a crowded station like Osaka or Umeda, this can cause a massive backup.
📊 Stress Levels: Gate Scenarios
Low Stress
Max Stress!
—
## 3. The Paper Ticket “Ghosting” 👻
While most travelers use IC cards, some still use paper tickets (like the JR Pass or single-trip tickets). The mistake here is **forgetting to take the ticket back**.
When you insert a ticket into the slot, it zips through the machine and pops out at the far end of the gate. Many people walk through and just leave it there.
* **Entering:** You MUST take the ticket back. You need it to exit!
* **Exiting:** If it’s a single-use ticket, the machine will “eat” it. If it’s a multi-trip pass (like a JR Pass), it will pop back out. **Don’t leave it behind!**
改札口
(Kaisatsuguchi)
“Ticket Gate” / “Exit Gate”
—
## 4. The “Transfer Gate” Paradox 🌀
This is the “Boss Level” of Japanese station navigation. In large hubs, you will often see gates *inside* the station. These are **Transfer Gates** (*Norikae Kaisatsu*).
The mistake? People tap their card at a transfer gate thinking they are exiting the station.
* **The Trap:** If you tap out at a transfer gate (e.g., moving from a JR line to a Subway line), you haven’t actually left the transit system. If you then try to walk out of the station building entirely, your card might error out because the system thinks you’re still “mid-journey.”
—
## 5. The “Short Fare” Freeze 📉
You’ve had a long day of sightseeing. You tap to exit the station, but—*BEEP*—the gates lock. You look at the screen and see a red balance. You don’t have enough money on your Suica to cover the trip you just took.
Many tourists panic and try to force the gate or look for a staff member immediately. While staff are helpful, there is a built-in solution designed specifically for this.
⚠️ Manner Alert!
If the gate blocks you, move backward immediately. Do not stand in the gate trying to fix your phone or dig for change. Step to the side to let the flow of commuters continue, then find the yellow “Fare Adjustment” machine.
### How to use the Fare Adjustment Machine (*Seisanki*):
1. Find the yellow machine located right next to the exit gates.
2. Insert your IC card or paper ticket.
3. The screen will show the exact amount you are short (e.g., “Shortage: 40 yen”).
4. Insert the coins or bills.
5. The machine will either return your IC card (now valid to exit) or issue a “Fare Adjustment Ticket.”
6. Use that ticket/card to exit the gate smoothly.
—
## Final Thoughts: The Zen of the Gate 🧘♂️
The Japanese rail system is a marvel of efficiency. The ticket gates are designed to process 60 people per minute. When you approach a gate, have your card in your hand (or your phone “awake”) before you even reach the yellow textured floor tiles.
If you do make a mistake—don’t sweat it! It happens to locals, too. Just step back, give a small “Sumimasen” (Excuse me) to the person behind you, and use the Fare Adjustment machine or talk to the attendant in the glass booth. They’ve seen it all before!